Showing posts with label SYW. Show all posts

Wednesday, 26 May 2021

One From the Archives... and a Goodbye

This game was in 2013 (I think.)  We were in the old gaming room at Wayland Games, so that dates it. I think we had not had the 18th Century Indians out for a few years, so we decided to have a big bash with pretty much all the native figures that we owned between us and just a few of the European troops.

The British General (Jim)looks on, stoically ignoring the heat, the flies and the thousands of screaming locals who want him dead...


Each force had a minority of European soldiers, British on one side, French on the other. These were supported by natives raised and trained in the European manner. The majority part of each army is composed however,  of Indian allies and their more or less reliable mercenaries and feudal subjects.


On the French right were many Native Allied cavalry. These, and their British counterparts, started the game out of command and with poorly rated generals, to simulate the lack of aggression shown by Indian armies of the period. The cavalry figures are drawn from as many sources as possible to give the Indian cavalry a suitably ragtag look.


Anchoring the centre of the French line; a motley collection of artillery, including: elephant and camel carried light guns, erratic rockets, giant Zam Zama ("Thunderers") and French 12lbers.


Serried ranks of French Foot companies with sepoys in close support. They have locally raised horse on their flank and the dubious assistance of elephant borne artillery on their right. This is the best led and most competent part of the army and would face the main British assault.


With superior numbers of European infantry present and all of them seemingly invincible (graded Elite) the British unsurprisingly lined them up to be their main attack force. Their locally raised sepoys were placed in the front rank to absorb the enemy's initial volleys and artillery fire.


The British copied their adversary's deployment, placing all their guns in the centre of the line but pressing forward aggressively with the European guns.


Under the gaze of their devious native prince (Nick), the British Allied cavalry took their time to get organised before heading towards the enemy horse. This delay was a two-edged sword; they were able to manoeuvre together but the time taken caused them to bear the brunt of the "friendly" rocket fire stationed in their rear.

The two armies are deployed and ready for the off...

General M. de Rumble

With Gallic imperturbability the French general (Les) spares a glance towards the flank where his unreliable Indian ally is situated.


Only to see that he (me) has snuck away! The French could place little confidence in the wily Maharaja who declares for them one day and against them the next.


The British too were supported by a fair-weather Indian ally, who had brought all manner of troops including elephants, camels, mercenary matchlockmen, peasant levy and armoured lancers.


Massed behind their Sepoys (natives trained in the European way of fighting) the British companies of Foot prepare to take the fight to the enemy.


The British Brigade is stung into attacking alone after being raked by French and native guns.


The professional French artillery, with some assistance from their Indian colleagues, continue to chip away at the advancing lines. Eventually the British guns are brought forward to silence them.


Like an immovable wall. The thin French line (a scarlet coated Irish regiment to the left) hold their fire until the first companies of British are at point blank range.


The British Sepoys and French foot traded destructive volleys and the French, along with their general, were eventually driven from the field. However helped by an Indian cavalry charge, they did enough damage to the British attack that the survivors were unable to push on against the unbroken line of French Sepoys that were revealed behind them. The British attack had failed and having no trust in their Indian allies to win the day for them, wisely chose to quit the field.

When I started transferring this game report from the old website onto this blog I had no idea it was going to turn in an in memoriam post. This just happened to be one of the few games where I got half decent pictures of the other three players not just the toys on the table. It came as a terrific shock on Saturday to hear that Les Rumble had died suddenly and very prematurely. Les has been my good friend and fellow wargamer for over 40 years, so this game described above was just one of hundreds during that timespan. Like many of them my main memories from this day are not the action on the tabletop but instead the banter, chatting about sports, mocking each others' newly painted units and planning what games we could run on the venues terrain boards. I shouldn't be surprised I supposed but it brings home how lucky I have been in the company I have shared this hobby with.

RIP Les. Grab a good place near the bar, get some terrain organised on a table and at some point we will carry on with all the planned campaigns and scenarios we never got round to...



Tuesday, 23 March 2021

Mahratta Mini Campaign

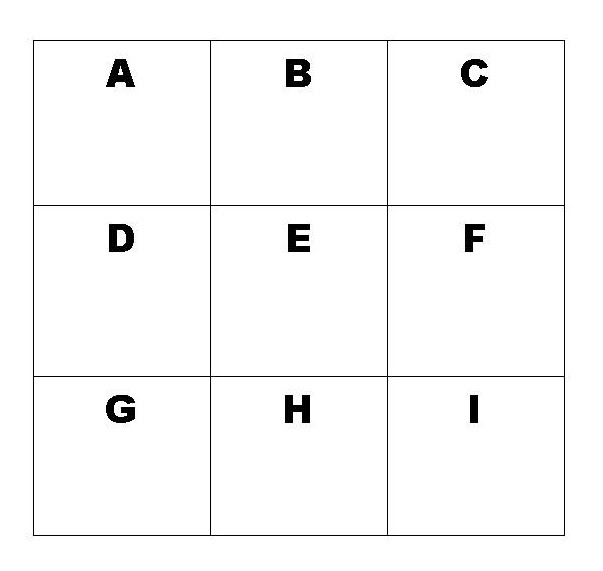
 Our game at the weekend was a test drive of a mini campaign system devised by Mr. Langford (if Nick "borrowed" it from elsewhere he didn't let on to me!) We had an invasion by a Mahratta Indian army across difficult terrain (jungle infested mountain passes?) with the intention of arriving at an enemy town with a large siege gun and knocking the gates down. The invaders would have to find their way to the enemy town and disperse the forces sent to slow / stop them. The way to the town was via a 3 x 3 grid of small tables representing possible route. (The original scheme was for a 4 x 4 grid but with fewer than the 4 players originally expected the grid was reduced.)


I chose to spread my 3 army commands across tables G, H and I, with the cavalry commands scouting either side of my main force in H. What I discovered was that G and H only had lateral exits from the tables and no enemy presence. Table I also had an exit into table F. So that is where I sent (what was now) my vanguard.


The Vanguard discovered an enemy force of matchlockmen and cavalry holding the pass ahead of them. This looked like causing some difficulty to my light Pindari cavalry despite their (or probably because of) support from a battery of camel borne rocket artillery. Despite the overwhelming firepower disparity, my brave Pindari cavalry pressed forward and peppered arrows at the enemy cavalry. The enemy shrugged off the hits and charged the skirmishing Pindaris but initially the combat was tied (only the impetus of the charge giving them some advantage.) A second round of melee was fought and the Pindaris were thrown back in disorder. Luckily for them the enemy cavalry commander was quite nervous of the remaining Mahratta Pindari regiment (which had, to be fair, formed up into a solid clump and wheeled to try to catch them in the flank) and he slowly retired the victorious cavalry to reorder their ranks.


(Click on photo for larger version)


Now the main force of my Mahratta army entered the battle – the enemy didn’t look so clever now! Behind the screen of Pindaris and Pathan mercenaries the Mahratta Matclockmen and new-fangled, European-trained Sepoys advanced rapidly in march columns. The Pathan jezzaillichis soaked up the first volley of the enemy matchlocks and then nimbly moved aside to allow the Sepoys to attack.


(Click on photo for larger version)


The controlled(ish) volleys of the Mahratta Sepoys reduced the enemy matchlocks to ruins and the remnants didn’t hang around to receive a bayonet charge. The next enemy infantry units now looked in imminent danger of being flanked and similarly dealt with, but their commander had seen the way the wind was blowing and retreated his survivors off the table so they could fight again another day.


(Click on photo for larger version)


There turned out to be only one route off table, F, so the battered retreating command was immediately followed up by my Mahrattas when they chose to stand and fight again.


They were down a unit from the previous fight and I should have been up one unit of sepoys but forgot to deploy them… Keen to cause more losses to the enemy units I acted more aggressively with my Pindari cavalry than previously. This had two unfortunate repercussions: the first was that by attacking the enemy infantry with my Pindari cavalry I left the Camel mounted rocketmen unsupported (where those extra sepoys would have been handy!) The rocketmen were chased off the table by enemy cavalry before they had even got off their camels or lit one blue touchpaper. I blame "newly painted unit syndrome" for this poor showing. Oh well they looked quite pretty which is the most you can hope for with a lot of Indian units!


(Click on photo for larger version)


The second repercussion was my Pindari cavalry getting shot to pieces by the infantry they were trying to pick on.


(Click on photo for larger version)


The enemy Sepoys blasted my skirmishing screen out of their saddles and then just by the skin of their teeth managed to form square before the second unit of Pindaris could fall on their flank and avenge their colleagues. Thwarted, the Pindaris carried on into the rear of the enemy line to find an easier target. They did spook the enemy cavalry into running away but once again a charge into the rear of matchlock armed infantry was scuppered when the infantry pulled out a manoeuvre card just before the cavalry could attack. To add insult to injury the matcklockmen also delivered a withering fire that soon had the Pindari unit much reduced.


(Click on photo for larger version)


The enemy holding force did not wait around for the main body of my army this time and slipped away, leaving two possible exits from the table.


Lessons learned there (or re-learned for the umpteenth time more likely); use the right soldiers for the right job. The Pindari cavalry is fine for scouting and getting into the rear of enemy horsemen but should steer well clear of infantry, even the modestly dangerous matchlockmen. Mobile close fire support is not the forte of rocketeers they should be dismounting and getting their missiles ready as soon as they arrive on table.


The strategic choice for me was to either press on after the retreating enemy force or head into table B on the chance it was my objective location (enemy town.) With my vanguard all but destroyed I had to decide if I would pursue with my main infantry command or ignore the enemy force and gamble that my rearguard, of mostly cavalry, could handle them if they came back into the rear as I advanced. Obviously, it being me, I took the dicey option and pushed the army into table B. This was indeed where the enemy town was located and would be the showdown of remaining armies (and more importantly the remaining Morale Chips that either side still had.)


(Click on photo for larger version)


Unfortunately we did not have time to fight this final game, as I had a prior appointment with my wife’s choir recital. The concept had been shown to be a good one anyway and should be improved with the addition of more players, so less control over the decision making when it comes to supporting a command that is in combat or sacrificing a screen to stop reinforcements getting to a battle. The small table encounters still had all the Piquet edge of the seat character and plenty of difficult decisions about where to spend initiative and when to husband resources for the future.


(Click on photo for larger version)

Indian 18th C. Army - The Cavalry

I'm not sure when my facination with all things Indian began but it was certainly the excellent articles in the first dozen issues of Minaiture Wargames in the 1980s (by Paul Stevenson) that focussed my attention on the wars of the 18th Century. In terms of converting this interest to the tabletop I had done nothing much more than search lists of 25mm figures for a suitable range and tinkered with converting Spencer Smith plastic grenadiers into matchlockmen. Then during a Seven Years War game with my friend  Nick, I mentioned my ambitions to extend the  conflict to the Indian subcontinent. Nick was full of enthusiasm for this idea, having been contemplating similar,  and so a joint project was born!


Mysorean cavalry Silhadar from Miniature Wargames issue 11


The issue of figure availability was still the main stumbling block. Nick being a fanatical adherent to 25mm miniatures, the opportunity to use easily converted smaller scale figures was not an option. The few ranges with usable examples were tracked down and then we moved on to looking at anything similar that could be drafted in with minimal conversion. Saracens and anyone else in a turban was considered.  The cavalry were the key part of 18th Century Indian armies, so many were required and a nice variety of poses and armours would be authentic for the irregular feel of the army. My first unit was mainly made up of figures from Essex Miniatures Sudan range, which had a nice selection of Arab cavalry with open hands for ease of weapon choice.


Our wishes were soon to be answered however as Wargames Foundry  issued their lovely Sikh Wars range of figures, sculpted by the Perry twins. Amongst all the 19th Century sepoys and uniformed regiments were the irregular cavalry of the Khalsa. These were not just great figures with multiple variations in their pose and equipment, but were perfect for the 18th Century Persian inspired armour prevalent across India. Result. Naturally we both bought scads of these little beauties, despite Foundry being the pricier end of the figures market. Mixed in with or previous scratchings and lighter cavalry from the Foundry ranges our units of  cavalry would have a mercenary and disreputable look that summed up the period perfectly to my eyes.


Indian cavalry, these are mainly Foundry figures.


Of course, buying the figures and actually getting them on the table are two very different things and I have to shame-facedly admit I let Nick do the heavy lifting of churning out the cavalry, whilst I got distracted after the first few units. I allowed myself  to be distracted to the fun parts of the Indian armies: the war elephants, Pathan Jezzailichis, huge siege guns and elephants with guns on. Once we had 18 Piquet style units of cavalry between us there was less impetus to paint more as we had plenty for many a fun game over the years that have followed.


The approach of another of these games after a few years' hiatus led me to pull out the unpainted lead to see if the urge was there to get something new on the table. A few easy subjects leaped out at me (not literally, although those boxes were pretty tightly packed!) A command stand and some camel mounted rocket chuckers were crowbarred onto the edge of the painting table for immediate attention. I also totted up my remaining cavalry castings. Crivens!  My only mitigation is that I can not resist adding Ebay bargains and "just a few" samples from any likely looking ranges that come along. I will have to put a bit of a dent in that total before I commit myself to another cavalry heavy army with the prospect of the Ottoman Turks.


Before I produce some more undercoated / half painted and forgotten units I thought it might be useful to do a comparison photo of what is easily available for the aspiring Maharrata leader in terms of cavalry figures. Since I started this project ranges from Bears Den and The London War Room for the period have sadly come and gone, and the tiny range from Falcon Figures UK have crossed the pond to US ownership.


Foundry: Still available, still a little bit pricey, but lovely nonetheless. The Sikh Wars Indians now reside under the name of "Noble Warriors".


Old Glory: Produced their own version of a Sikh Wars range with similarly useful cavalry but less choice (pretty good value though.)


Redoubt: Their "Wellington in India" range should be perfect for this but the figures are in fact 35mm tall and a bit lacking in choice and character amongst the cavalry.


Indus Miniatures: A boutique range so growing slowly. Great little models all sculpted and cast excellently.


Eureka Miniatures: Don't have any of these as they come from waaaaaay the wrong side of the planet making them very expensive.  If  the Pound remains valued in  beads and shells into the future, then I never shall.


(Click on the photo for a larger version of the image)


As can be seen(?) the Foundry figures sit between the dinky Old Glory cavalry and the Redoubt figure. The Indus cavalryman is a little slimmer  than the Foundry models but match up pretty well overall. The only figure that might work well with the Redoubt rider is the (now defunct) London War Room example. The lower half of the figure is moulded to the, quite large, horse. A shame, as the Redoubt figures have a lot going for them: quite cheap, paint up nicely and look authentic. For me however variety is the spice of life so I have mainly confined Redoubt figures to command stands and artillerists.


Ottoman Test Figure

Ottoman armies have always been an interest of mine. One of the key powers through the 15th to 17th Centuries and with an army to be feared; plenty of excellent cavalry and, when Janissaries were added, good, regular disciplined infantry. In addition they had reams of raiding light troops and volunteer mujahedeen types to strike terror into their neighbours.


It is the 18th Century that holds my main interest however. After the narrowly failed siege of Vienna in 1683 the Ottoman state and army went into a period of decline. There were still military successes and attempts at reform but the Ottoman Empire was on the defensive from there on in. There is a real scarcity of information about the Ottoman army of this period (in English at least) which is part of the reason it is less well catered to for wargamers.  Much of what is offered (in 25mm at least) seems to be extrapolated from sources from the early 17th Century and the 19th. Armour does seem to have fallen out of favour, except for a very few Guard units, and foot becomes predominantly musket armed.  Uniforms are not much in evidence, so to my mind it means I have the opportunity to use the same  figures for the bulk of the army throughout the period.


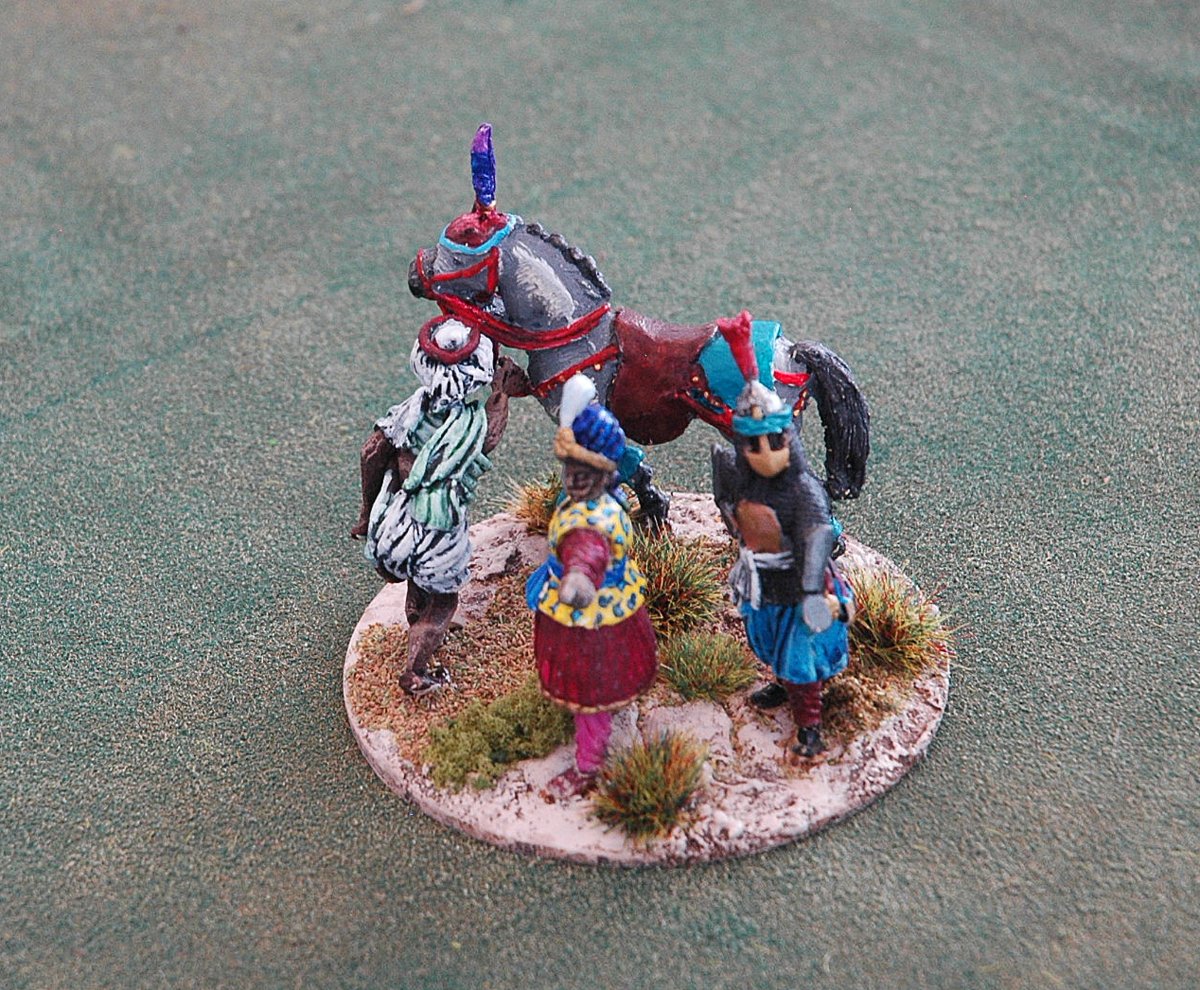
Inspired by  conversion projects seen online, I decide to have a try at converting some suitable plastic figures. After a modicum of research the most promising  subject looked like the Zouaves made by Perry Miniatures for the American Civil War.


Although intended for the later 1800s the general style is based on the North Africans who had been a part of the Ottoman Empire, but could represent the general shape of Ottoman dress on campaign with a bit of adjustment.


Some of the fancier braid could be shaved off or just painted over for lower grade soldiers and the turbanned heads included would be pretty close to earlier styles. The biggest issue is the rifle  carried by the figures. A bit of clever converting and painting might do to hide its provenance or a new musket of the earlier style used to replace it. A third option would be to cast up a new arm with the correct weapon and this would enable some change to the pose of the figure at the same time.


I had the idea that I would want the Ottoman regiments I would create to have the look of aggressive troops, ready to get into hand to hand, even if this wasn't quite the truth for the period... Thus having them charging with sword in hand and musket carried in the other might give me a morale advantage as they are deployed onto the table (however little they live up to this subsequently!)  This ambition would require the creation and casting up of some new arms with the correct weaponry, as life is just too short to do individual conversions on hundreds of foot soldiers. I have always fancied a go at this anyway but I decided I would make up one prototype and paint it before diving into this.


The officer sprue in the Zouaves box has an army wielding a likely looking sabre, close enough to a scimitar for this test.  A number of arms were then hacked to pieces and putty and wire forced into a shape vaguely resembling an earlier eastern type of musket.  I also considered chopping back some of the kit carried by the ACW infantryman but relented and left it in place. Why make myself more work at this stage? A quick coat of paint to hide the worst of my cack-handedness and he was done.


I am reasonably happy with that. It gives the required impression of "charging in with cold steel"  and exotic easterner.  Several regiments of these wielding purposeful yataghan swords rather than girly scimitars will I hope give an opponent pause for thought. Time to practise those putty pushing skills...

Matelots and Mohawks - SYW in North America

 I have always been a sucker for combined operations in the days of sail and the French and Indian War in North American did seem to have more than its fair share. This is probably due to the importance of waterways as communications routes and the sparsity of good roads in many of the theatres for moving men, supplies and ordinance. How to incorporate this sort of element into a scenario in a way that added interesting choices for the players without totally dominating the game would be the trick.

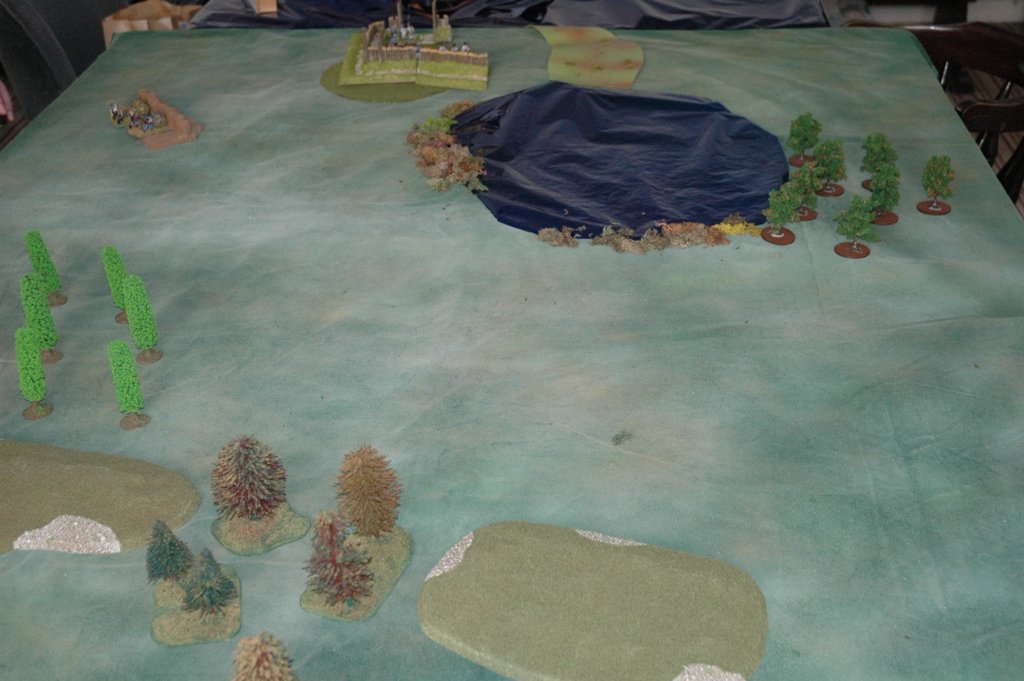
The western end of the table, trees represent thick (type 3) forest, all the rest of the table is assumed to be covered in open (type 2 ) woods.


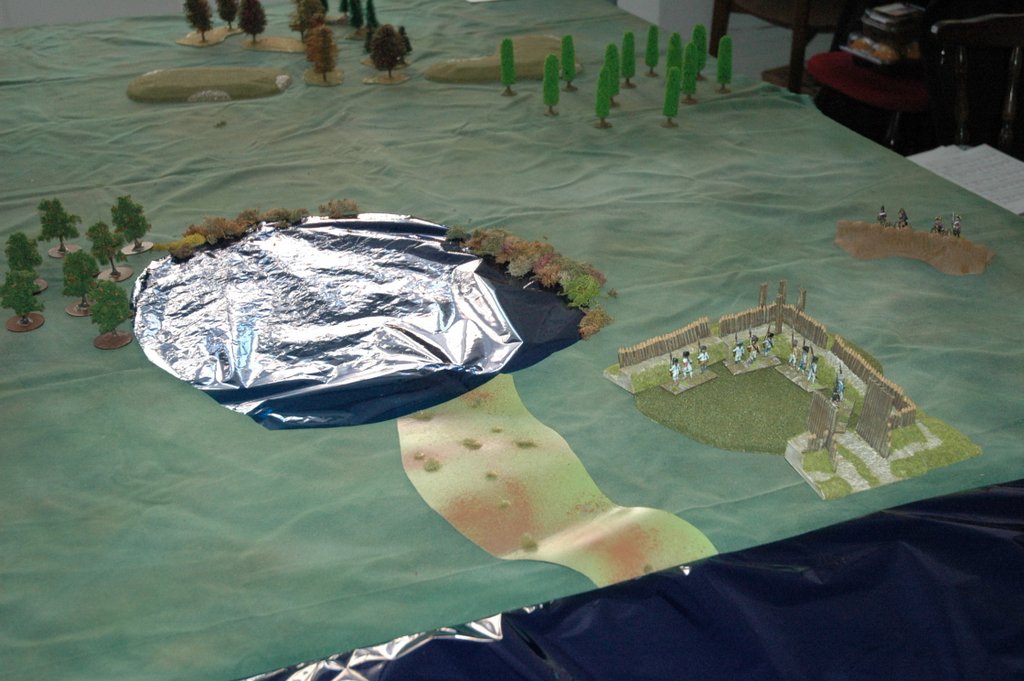
I decided on a scenario where a company of American militia were rebuilding Fort William Henry on Lake George but had been cut off by a French force sent to stop the works and regain control over the lake. A scratch British relief force mainly consisting of Provincials, militia and volunteer sailors would be trying to rescue the stranded Americans and if possible see off the French. The British would have a secret weapon to help their cause, the brig HMS Whilbrel with batteries of 4lb cannon and landing partied of sailors (heavily armed and keen as mustard!)  The French had a trick up their sleeves too; canoes hidden on the shore of the smaller lake ready to transport two companies and steal a march on the enemy...


The eastern end of the table, Lake George in the foreground and a small lake the other side of Fort William Henry, connected to the larger lake by the swampy ground.


The French line of regulars deployed to stop the British advance.


Of course the scenario plan went out of the window on contact with the enemy players. My idea was that the French would await resupply of roundshot for their guns before battering down the rebuilt palisade and walzing in to capture the fort. Meanwhile the bulk of their army would be fending off the relieving British and occasionally being attacked by their own disgruntled Huron allies! Instead the French commanders decided on an all-out frontal assault on the undamaged (if unfinished) fort... The French also used their canoe transport to send two units around the back of the fort, through the swampy ground linking the two lakes.


French companies prepare to assault the ramshackle fort.


The poor militia company found themselves with swarms of indians and Frenchmen on all sides and it was only the support fire from HMS Whimbrel that was able to provide any assistance. The militia eventually abandoned the half-built palisade and formed a desperate square next to the swamp.


HMS Whimbrel passes close to the shoreline to play her guns on the French infantry.


On the main part of the table the British column trudged through the woods towards the waiting French companies and Indians skulking in the thickest parts of the forest. Although inexperienced militia foot and horse got in each other's way, slowing down the advance, the companies of rangers were able to prowl through the rougher areas, roughly handling the enemy native allies and putting the masses of  Huron to rout!


The British column advances across the table, militia cavalry to the fore.


A cordon of Rangers sweeps through the woods.


Despite the lack of useful support from their Indian allies the experienced French regulars and Marines stood their ground and saw off the provincial light dragoons with much carnage. Then despite being peppered with musketry by the enemy rangers now in control of the woods, they gave the British 44th Foot a volley and charged with their bayonets putting them to flight as well.


The thin French line repels the few British regulars.


As the days light was fading the British had failed to break through to the aid of the fort, but even so the militia garrison was still holding out in its square surrounded by the now chastised Indians. Sailors from HMS Whimbrel were landing on the beach but had not yet managed to escort the militiamen to safety. The French roundshot for their cannon had still not arrived allowing HMS Whimbrel to be anchored right on the shoreline blasting at anything that would come in range.


A brilliant move; Indian canoes transport the French Compagnie de Marine to the open rear of the fort.


No one seemed that fussed about who had actually won the game at the end (which I took as a positive point.) The French players admitted to not having read the victory point conditions in fact. (Note to self: VPs at the START of briefings from now on!) When I calculated them the French won by a single point, mainly due to the helpful slaughter of the troublesome Huron by the British, which garnered a point for the French for every unit destroyed.


The few defenders of Fort George watch with consternation as the French attack develops...

Attacked from all sides the American militia make a break for the back of the fort hoping to cut their way through to the lake shore.

The broken remnants of the 44th Regiment flee through the supporting New Jersey Militia company.