I have tinkered with home casting of lead* figures in the past mainly using Prince August moulds. Always imagined it would be very satisfying to field an army of miniatures that were my own creations. The whole having to be able to sculpt the master that will be moulded hurdle kept this plan in check for many years but eventually the example of a number of blogs has pushed me to have a crack at it. It was inspiring to see a number of gamers just get on with it and not be too concerned with producing stunning works of art. (*in fact some sort of white metal that is mostly tin I suspect.)

Prince August home casting kit.
My yen for an 18th Century Turkish army to take on my Austro-Hungarians, looked like a promising object for the plan. For the infantry I decided to use the Perry Miniatures plastic ACW Zouaves modified to make them less regular and 19th Century looking. For the cavalry I would need an unarmoured rider who would serve as Timariot Sipahis and later mercenary / militia cavalry. The cavalryman could have a separate head to allow for a bit of variation. Also a right arm wielding a scimitar, which could be swapped out for a lance or firearm for further multiple use of the basic casting. The cavalry would be mounted on the nice plastic horses available from Perry Miniatures or Warlord Games. I used a "dolly" from Ebob as the skeleton that I could pose and know was about the right proportions for a wargames figure. Epoxy putty was then added to give bulk to the body as well as clothes / other details.
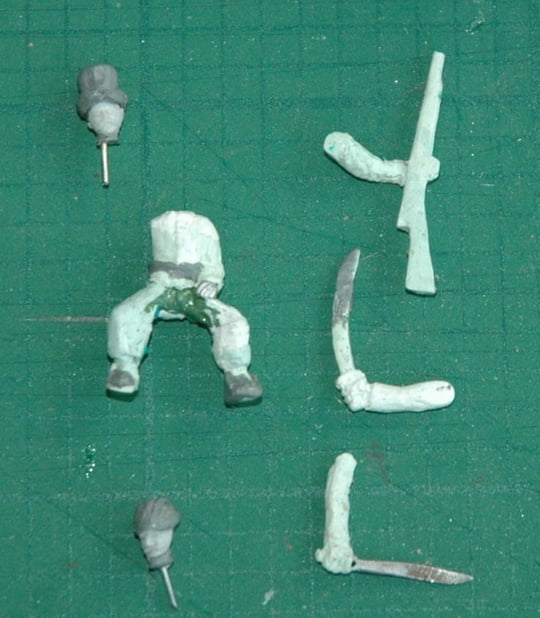
The masters "ready" to go into a mould...
The infantry figure needed a new pair of arms. One wielding a wickedly sharp looking yataghan sword. The left arm carrying the musket. Again a form constructed of wire and plasticard was made for the putty to be added to. I started with grand plans for half a dozen interchangeable arms for the infantry and horseman but just the three minimum required took long enough to complete. I consoled myself with the fact that I could cut away sword blades to convert the right arms for other purposes (holding lances, flagpoles etc.)
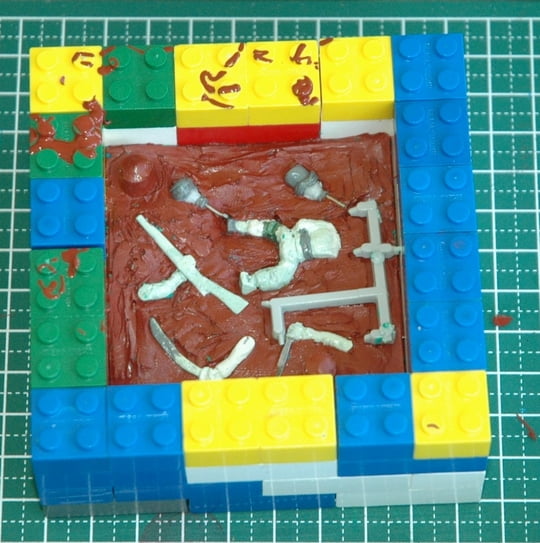
The lego mould box to contain the liquid silicon rubber until it had hardened.
For my first ever silicon rubber mould I bought a tin of the correct grade of liquid rubber from Alec Tiranti in London. It comes with the catalyst that starts the reaction that turns the liquid rubber into the solid mould that can accept hot molten metal. I had read many articles over the years about home casting and got some good advice from current bloggers making their own moulds. I freely adopted the elements of others processes that looked like they would suit me and plunged in to see how it all worked.
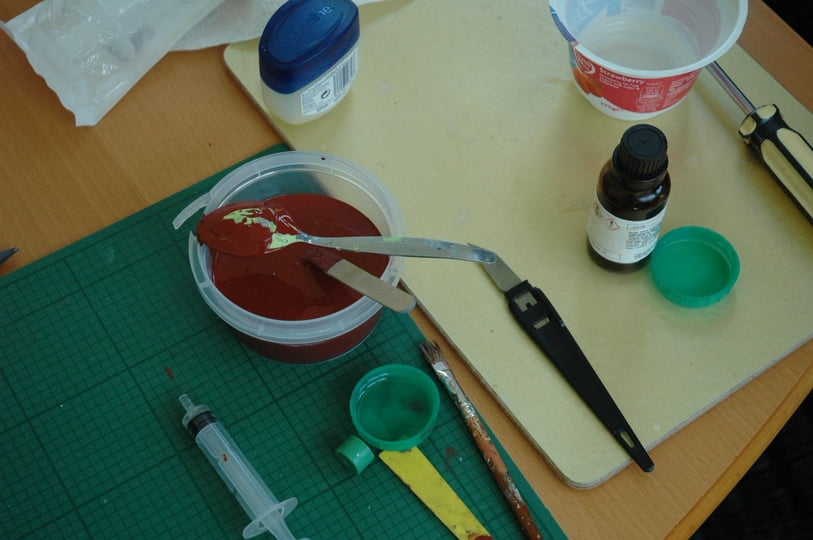
Tools and containers required. The liquid silicon rubber stains everything it touches!
Some bits went well: Lego for the mould box was very successful and versatile. I did get a bit too ambitious wit the number of components that I tried to stuff into one mould however (one body, three arms and two heads made the channels that the lead is supposed to travel through very constricted.) At the end of the process however I had a solid chunk of rubber with the clearly identifiable hollows where my sculpted masters had been.

A completed mould!
My lack of experience in laying out my mould became apparent when I poured hot metal into it for the first time. Less than half of the mould filled up correctly, it was a bit disheartening. I did remember that air getting trapped in the mould is a common problem and vents need to be cut to allow it to escape. Some careful cutting with a sharp knife in the restricted space of the mould gave me the vents and some further surgery to improve the sprue to each component was carried out. Eventually I was getting the entire mould casting successfully on almost every pour!
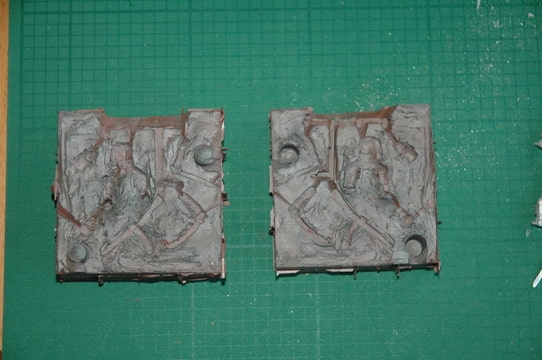
The mould with vents cut and blackened by graphite powder which aids the flow of the molten metal.
Once I had enough bits to be able to construct 8 cavalrymen and convert a bunch of infantry, I stopped the addictive process and went to work on the output. The drawback with my "clever" scheme with all the separate arms now became apparent. Having to glue the bloody thing in place! Yes I do get instant variation in my Ottoman units but I pay for this with having to file every join flat to be superglued. I had probably over estimated where my patience will run out with this. Instead of dozens of units I may not get beyond five or six.
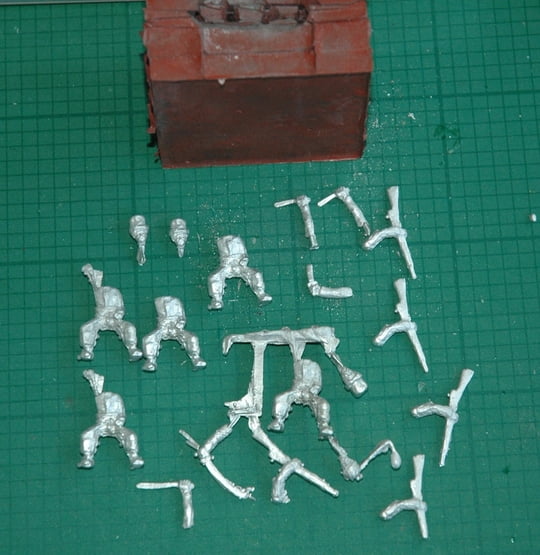
Shiny new castings...
So far then not perfect but more of a success than I had expected. I will have learned from my mistakes for he next moulds. Yes there will be next moulds as the production of shiny new figures from a mould is quite addictive. My Turkish units from these initial castings will have their shortcomings disguised in the usual way; with nice looking bases and large pretty flags!
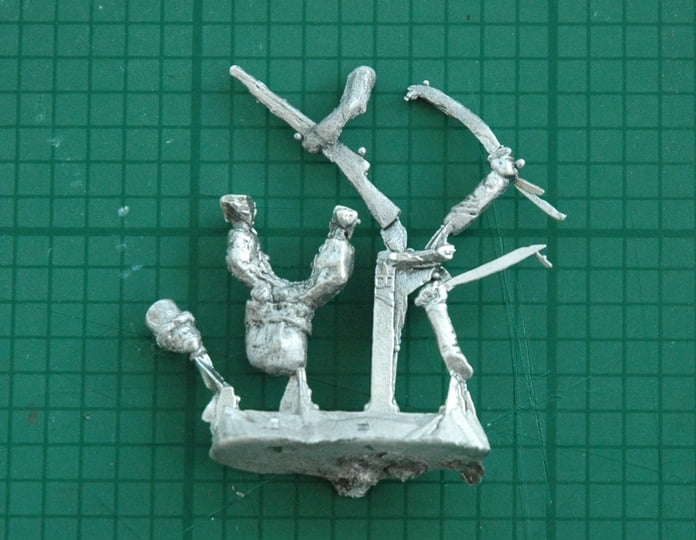
Lots of pieces packed in a mould. Too many it turned out.


No comments:
Post a Comment